Congratulations! Your construction project is finally complete, and you’re excited to move into your newly renovated space. However, before you unpack the boxes and settle in, there’s one crucial step remaining: the post-construction cleaning. Construction inevitably leaves behind a trail of dust, debris, and grime. Tackling this initial cleaning effectively will ensure your new space is not only beautiful but also healthy and comfortable to live in.
This comprehensive guide will equip you with the knowledge and strategies to conquer post-construction cleaning. We’ll delve into the essential tools and techniques for removing dust and debris, ensuring a sparkling clean for your new environment.
Why Post-Construction Cleaning Matters
Construction dust is more than just an eyesore. It can contain harmful particles like silica, lead, and asbestos, depending on the materials used during construction. These particles can irritate your lungs, causing respiratory issues, especially for children and individuals with existing respiratory problems. Additionally, leftover dust can attract allergens, contributing to allergies and asthma.
Furthermore, neglecting post-construction cleaning can make future cleaning more challenging. Dust settles on surfaces, creating a grimy film that then attracts and holds onto dirt and debris. This makes regular cleaning more laborious and less effective.
Getting Started: Planning and Preparation
Before diving into the cleaning frenzy, take some time to plan and prepare. Here are some key steps to ensure a smooth and efficient cleaning process:
- Schedule Your Cleaning: Ideally, schedule your cleaning for after the final inspection and when all construction debris has been removed by the contractors.
- Gather Supplies: Invest in high-quality cleaning tools and products specifically designed for construction cleanup. Here’s a basic checklist:
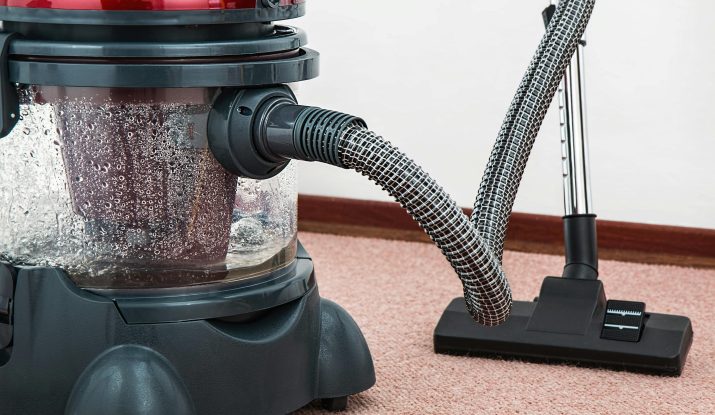
- Heavy-Duty Vacuum Cleaner: A powerful vacuum cleaner with a HEPA filter is essential for capturing fine dust particles.
- Microfiber Cloths: These lint-free cloths are perfect for picking up dust on various surfaces without scratching.
- Mops and Buckets: You’ll need separate mops for floors and walls, along with appropriate cleaning solutions.
- Brooms and Dustpans: For collecting larger debris.
- Trash Bags: Opt for heavy-duty trash bags to handle construction waste.
- Drop Cloths: Use these to protect furniture and carpets from dust and cleaning solutions.
- Safety Gear: Consider wearing a dust mask, gloves, and eye protection during cleaning.
- Clear the Space: Remove any remaining furniture, appliances, or belongings that weren’t removed during construction. This allows for unobstructed access to all surfaces.
- Protect Remaining Fixtures: Cover any fixtures you can’t remove, like bathtubs and sinks, with drop cloths to prevent them from getting dusty or splashed with cleaning solutions.
- Open Doors and Windows: Ensure proper ventilation throughout the cleaning process. Fresh air will help circulate dust and fumes outside.
The Cleaning Process: A Step-by-Step Guide
Now that you’re prepped, it’s time to tackle the cleaning. Here’s a step-by-step approach to ensure a thorough job:
1. Remove Large Debris:
- Start by removing any leftover construction materials, tools, and debris. Use brooms and dustpans for larger pieces and heavy-duty trash bags for disposal.
2. Address Dust:
- High Ceilings and Hard-to-Reach Areas: Use a stepladder and an extension pole attachment for your vacuum cleaner to remove dust from high ceilings, light fixtures, and corners.
- Walls and Baseboards: Walls can harbor a surprising amount of dust. Use a microfiber cloth or a vacuum cleaner with a soft brush attachment to remove dust from walls and baseboards. Be gentle to avoid damaging the paint.
- Windows and Doors: Don’t forget to clean window frames, sills, and tracks to remove dust and grime. Wipe down doors, door frames, and hardware as well.
3. Deep Clean Floors:
- Vacuum floors thoroughly, paying close attention to corners and edges where dust tends to accumulate.
- Depending on your floor material, you might need to follow up with mopping. Use the appropriate cleaning solution for your specific floor type. For example, hardwood floors require a different cleaning solution than tile floors.
- Carpets: For carpets, a professional cleaning service is highly recommended after construction.
4. Focus on Detail:
- Once you’ve tackled the major areas, focus on the details. Wipe down switch plates, doorknobs, cabinet handles, and other fixtures. Don’t forget to clean air vents to remove dust that could circulate through your new HVAC system.
- Kitchen and Bathrooms: Pay close attention to these areas, as they require extra sanitization. Clean cabinets, countertops, appliances, sinks, and faucets. In bathrooms, disinfect toilets, bathtubs, showers, and vanities.
5. Final Touches:
- Once everything is clean, dispose of trash bags and used cleaning cloths properly.
- Replace air filters in your HVAC system to ensure clean air circulation.
- Wipe down any remaining surfaces with a damp cloth to remove any cleaning solution residue.
- Open windows and doors for additional ventilation to remove lingering dust particles and construction odors.
Additional Tips for Cleaning After Construction
- Work from top to bottom: Start with high surfaces like ceilings and work your way down to floors to prevent dust from settling back on already cleaned areas.
- Change your vacuum cleaner bag/filter frequently: As you vacuum construction dust, the filter will clog quickly. Regularly change or clean the filter to maintain optimal suction power.
- Label cleaning solutions: Clearly label all cleaning solutions to avoid using the wrong product on a particular surface.
- Be mindful of leftover materials: Some contractors might leave behind leftover paint or caulking. Decide how you’ll dispose of or store these materials before they become a cleaning hassle later.
- Consider professional help: For extensive construction projects or if you have concerns about handling hazardous materials, consider hiring a professional cleaning service specializing in post-construction cleaning. They have the expertise and equipment necessary for a thorough and efficient cleaning.
Maintaining a Clean Home After Construction
- Regular vacuuming: Frequent vacuuming, especially in the first few weeks after construction, is crucial for capturing residual dust particles.
- Dusting surfaces: Regularly dust surfaces with a damp microfiber cloth to prevent dust buildup.
- Deep cleaning: Schedule regular deep cleaning sessions to maintain a clean and healthy environment in your newly renovated space.
By following these cleaning strategies and remaining diligent, you can ensure your post-construction cleaning is a success. You’ll be left with a sparkling clean, healthy, and comfortable space to enjoy your newly renovated home.